Well, if anyone has tried to follow my lessons I am truly sorry. I just quit on the quilt and on you. I did last week get back to the quilt and forgot to make any pictures of the progress. I am at the quilting stage and will make some pictures tomorrow and post them. In the mean time I will try to do some writing and get you up to date as well. The quilt did not turn out as large as I wanted it to so I had to figure out what I wanted to do to make it larger. Then I had to go off and find the fabric to do it with. I am excited with the results so I hope you will like them too. I promise to be back on soon.
Tennye
Sunday, October 12, 2008


Friday, August 15, 2008
Lesson Five

Welcome back to lesson five I have photos to share with you this time around. In the last lesson we discussed cutting strips two inches wide out of our fat quarters. This is what mine looked like after I got them cut and using a quarter inch seam allowance sewed them together.
The next step to take is to measure the size of the three strips and see how wide they are.
 Usually they will be six inches wide.
The next step will be to cut the squares out of your strip sets. Cut them the same size as they measure across. This will make them square and will make the beginnings of your quilt. I sometimes stack them in a staggered manner so they will stay smooth and not be crocked when you cut them. It is hard to see in the photo,


but I did add these photos anyway.
The next step will be to figure out what pattern you want out of
your squares. I usually do the traditional rail fence, however, you
can do what you want to it is your quilt. I look forward to seeing you next time to add the boarders. See the options I have tried below.
Tennye ;)


Wednesday, July 30, 2008
Learn to Quilt-Lesson Four (finally)
Well, if you had been signing on to learn to quilt and I lost you because I have gotten so terribly busy that I didn't get on for weeks. I would like to ask you to forgive me. I am back!!!
I am not going to ask you to purchase a large amount of fabric for this first outing. You will need about three fat quarters for this first quilt. This will not be a large quilt. If you are wondering what a fat quarter is, it is a quarter of a yard of fabric cut from the half yard and then it is only one side of the 45 inches. So it is 18x22 instead of 9x45. Make sure each fabric is a different color or a very high contrast.
Please press your fabrics and make sure they are all crisp and ready to work with. Lay them out with the long sides horizontal. _________> Using your rotary cutter and ruler cut each one into as many 2 inch strips as you can cut it into. Now sew one of each color into strips of three. Make sure all sets of three strips are in the same order. I will try to add photos in the next post and I hope you will have yours completed but then. I hope not to be so long in coming back. Good luck and please show me what you are doing.
Tennye
Monday, June 23, 2008
Lesson Three
Well, sorry for the delay and for there not being any full fabric requirements. I have not made a plan. I have had some personal problems that have taken my mind too far off what I needed to be doing. Then we had a family reunion over the weekend and last weekend for Father's day we did a Birthday party for my new son-in-law in the town they live in. It has made my life crazy and the classes out of sink with what I meant for them to be. I will make an attempt to work harder with the writing so I will be ahead of us.
So lets talk more about fabrics and colors. What kind of color selections do you make and do you have trouble with color? Always feel free to ask for help most fabric ans quilt stores have someone who is willing to help you pick the fabrics. Once you have a basic color scheme you want to start with they will be able to help you find either matching or contrasting fabrics to help you make your chosen color come out and shine.
Lets say you really like a floral fabric with pink roses on a cream back ground with lovely green stems and leaves. You take it to the fabric store and you find a nice soft pink , two soft shades of green, and a lovely cream, with a bright dark pink. Now you have six fabrics for your wonderful quilt and you can now start to cut the design knowing the focus fabric which is the floral fabric will be highlighted by the lovely fabrics you have chosen for your quilt. Think outside your box and look at colors you don't normally use or like. Pick colors that you think are ugly sometimes and be surprised when they turn out to be the one color that makes your quilt beautiful.
I am working harder for you I promise. Have a good week and we will look forward to lesson four. I am also working on the Block of the month so watch for that as well.
Tennye
Monday, June 9, 2008
Learn to Quilt-Lesson Two
Welcome to Lesson Two
Today we learn more about using the rotary cutter and mat and next week we will start with the fabric requirements and cutting squares for the quilt.
When cutting with a rotary cutter you always must use a mat or you will damage the table you are cutting on. There is a discussion about cutting mats and which one is the best. I have had an Olfa mat for about 15 years and it is still in good shape. The mat has a one inch grid on it and I use a ruler that also has a grid. When cutting fabric I line it up on the mat grid and then I line up the ruler using both the gird and the ruler grid too before I cut. This will help assure the cut is straight. When you are cutting multiple layers of fabric check often that you have it lined up to make sure you don't get curved lines. When you are cutting half inch lines always make sure to use the ruler lines to line it up top and bottom of the fabric. I will try to have some photos next week with the cutting requirements for the pattern. We will leave cutting triangles and other shapes until we are using them for a block. So see you again next Mon. with the Fabric requirements.
Have a good week.
Tennye
Thursday, June 5, 2008
How is your day going?
I am working hard to finish my first quilt for the commission of the man's clothes. I start the next one Mon. out of his dockers. This one is his blue jeans. The next two or three will be made from his shirts. Then I will be working on the t-shirts and sweat shirts and they will be made into small quilts that can be used as baby quilts or just child size quilts. What are you working on? I would love to know.
Tennye
Tennye
Monday, June 2, 2008
Learn to Quilt-Lesson One
Hello to all who may be reading my blog. I have not been consistent with my writings and I know that. I have taken that into consideration when I decided to offer to you a free class on "How to Quilt". I have not decided how many classes this will consist of, however, I shall begin at the beginning . I would not want the beginner to find themselves confused or distressed in the learning process. I personally am a kinetic learner, who is better off by being shown what to do and then doing it. However others learn visually and others learn by hearing. I do not have the capability of teaching by voice. However I am able to use photos as well as my words and if at all possible drawings. So for any interested this will be class or lesson 1.
Lesson One
Quilting is the process of putting together three layers . Generally it is also a process of cutting larger pieces of fabric into small pieces, then sewing them back together. To use as one of the layers in the quilt. Quilts have traditionally been used for warmth, in a utilitarian manner. They have also been used as a decoration. Over the centuries many have used them for other reasons as well. In the Bible times they were used as clothing to protect in war. Almost as a shield.
Currently we use quilts for many things including the traditional ones of warmth and decoration. Many artists use fabric as their personal method of creating. So history and descriptions aside now we will move on to the process of learning what and how to quilt.
Quilt fabric is generally 100% cotton however there are other fabric choices for different times.
For our purposes until we get to future lessons we will recommend only using Cotton. Many discussions have centered around how to handle your fabric. The general thought is you should wash all fabric prior to using it. I suggest you wash it in smaller pieces so that it is easier to handle. Iron after washing and if you want you may use starch to give it a crispness. This will make it easier to cut.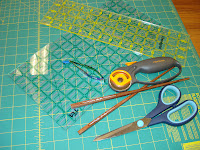
Tools- Well, the tools of the trade as you say are those that you use when making quilts, but also the same as the ones used for sewing in general. Scissors, thread, needles, thimbles, pins, and then you move on to other newer tools. Rotary cutter and mat, rulers, and template material, along with many new things we will learn about along the way.
That is all we are going to do today. Next lesson will be next Mon. and we will start with a project you may use to learn to quilt.
Thank you for joining me and I look forward to seeing you next time.
Tennye
Lesson One
Quilting is the process of putting together three layers . Generally it is also a process of cutting larger pieces of fabric into small pieces, then sewing them back together. To use as one of the layers in the quilt. Quilts have traditionally been used for warmth, in a utilitarian manner. They have also been used as a decoration. Over the centuries many have used them for other reasons as well. In the Bible times they were used as clothing to protect in war. Almost as a shield.
Currently we use quilts for many things including the traditional ones of warmth and decoration. Many artists use fabric as their personal method of creating. So history and descriptions aside now we will move on to the process of learning what and how to quilt.
Quilt fabric is generally 100% cotton however there are other fabric choices for different times.
For our purposes until we get to future lessons we will recommend only using Cotton. Many discussions have centered around how to handle your fabric. The general thought is you should wash all fabric prior to using it. I suggest you wash it in smaller pieces so that it is easier to handle. Iron after washing and if you want you may use starch to give it a crispness. This will make it easier to cut.

Tools- Well, the tools of the trade as you say are those that you use when making quilts, but also the same as the ones used for sewing in general. Scissors, thread, needles, thimbles, pins, and then you move on to other newer tools. Rotary cutter and mat, rulers, and template material, along with many new things we will learn about along the way.
That is all we are going to do today. Next lesson will be next Mon. and we will start with a project you may use to learn to quilt.
Thank you for joining me and I look forward to seeing you next time.
Tennye
Subscribe to:
Posts (Atom)